A-dec 500 Dental Chair Overview
Duration 15:53Watch these expert tips on how to leverage the robust features and functionality of the A-dec 500 dental chair.
Learn more about the A-dec 500 dental chair.
Video transcript
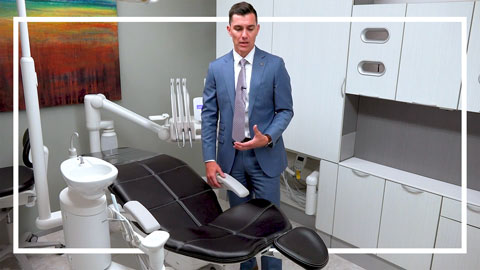
So, now we're going to talk about your new A-dec 500 chair. We're going to talk about the functionality and the features of the chair that are really important for you to know and understand.
The first one is the power button that's at the base plate of the chair. This is an important feature to know that it is there. It is something that you won't have to use, but we want to make sure that you know that you have that there. This power button every now and then can be depressed by a patient getting in and out of the chair—hitting with their heel, or the cleaning crew will come through on a weekend and they'll be a little aggressive around the base plate of the chair and they might hit that switch and disengage that switch, which then turns off all power to the delivery unit and the chair itself.
There are sometimes I get a frantic phone call on a Monday morning—the office will say “my chair isn't working,” and the first question I ask them: “Is the button at the base of the chair, has that been disengaged? Please press it to turn it on then from there you can actually turn the master toggle on the delivery unit on." So, that's important to know that that is there.
Moving on to the master toggle on the delivery unit. When we are looking at the master toggle, it is over here on the left side of the delivery unit. And it is this little switch that we're going to turn up and down that has the little power logo. So, we can turn it down to turn it off. We flip it up to turn the unit on. You'll notice that the touchpad then turns on. So that is the ability to turn your chair on and off to use the up/down and the tilt of the backrest.
From there as we move from the power button and the master toggle, we can then get into the limit switch or the stop plate that we have at the base or the lift arm of the chair.
The base plate is down here, and it will engage when something blocks it. And so, when I put my foot down here and I put it in the way—and I try and bring the chair down—what you'll notice is that the chair is going to engage and come up to try and remove that blockage from underneath the chair. If I keep that engaged and I try and press the chair down or bring the chair back, you'll notice that the touch pad will then display, “Chair is disabled by stop switch,” or “limit switch.” The only way to disengage that is to bring the chair up, to allow that blockage to be removed from the chair.
As we move away from that limit switch or the stop switch, we can then get into the swivel down here. When we unlock the swivel—bringing it to the right—we have the ability to camp the chair in 30 degrees in either direction. So, if you find yourself being in a limited situation,—as far as spatial limits, from headrest to the wall or the cabinet that you have in your operatory—you can actually turn the chair or swivel the chair, and that will allow you to create more room for you to get in your doctor's stool or operator stool to get up underneath that patient and work more at the 12 o'clock. We will then place it where we like it. We turn that lock back to the left and that will lock the chair into place. One thing to note about the swivel lock, is that sometimes if you are using that on a regular basis that lock can loosen up and if you find yourself having to push this all the way over, more than likely we need to tighten that lock. There's a set screw in there that's an Allen wrench, all you're going to do is basically turn that Allen wrench to the right a quarter turn or a half turn. It will then help put that swivel lock and make that tighter. So, that's something that's very important, as far as right is loosening that swivel and turning it back left is going to lock the chair into place.
So, as we move up on the chair, we can get into our hand rests here, our armrests. So, these armrests are two-position arm rests. And these are a new design on this chair. What we found with most patients is that a lot of the time they didn't know where to put their hands. Now we have the ability for patients when they sit in the chair, they can grab on and white knuckle if needed. You still have the support for the elbows with the wing back of the chair here, but if you do have patients that want to white knuckle and grab on, this hand rest is nice for that patient to be able to utilize. When you're seating a patient, you're going to want to flip these hand rests forward and that will give the patient the ability—kind of like a runway—to come into the chair to sit down properly in the chair.
What we sometimes see is that patients see this knob where that the armrest actually attaches to the chair, they see that as a barrier and what they will do is they'll come to the knee break of the chair and they'll sit there and it forces them to sit uncomfortably in the chair. So, what we recommend is—depending on which side of the chair they're going to enter on—we flip that armrest forward and we give them that runway, to be able to sit in the proper position in the chair. If you get into a situation where your patients are uncomfortable, they feel like they're locked in. You can flip both of these forward and you give that patient a little bit more room as well. Or if you want to work direct, there is a cut out on the base plate of the chair here, which will allow you to get closer to the patient, to work direct—if you want to take any intraoral pictures or anything like that—to allow you to get close to the patient so you can move the armrests or hand rests out of the way.
So, as we move into being seated properly, the thing that's most important is that we have to understand how the chair works and how we can move the chair. So if we look at the touchpad over here, either your delivery touchpad or your assistant's touchpad you can use the functionality of your presets, as well as being able to manually move the chair up and down. So, on the new 500 touch pad, we have our entry and exit button, which is basically going to bring the chair all the way down and it's going to bring the chair back up. It's going to give you the ability to have that patient get in and out of the chair very easily.
We also have the treatment position and we can store these settings how you would like. So, depending on how you like to work, we can have presets—and we can change these presets—to program to your liking. So, this one would be your supine treatment position. And then the last one we have here is last stored position if you will. And where this is important is, let's say you get your patient into a good position, so you're going to bring the chair down a little bit. You're going to bring the back down a little bit and so you're happy with where that patient is. You're doing the procedure, you're 15 minutes into it, but then you have to go do a hygiene check, or you get an emergency phone call, or something happens to where you need to get that patient up into a comfortable position, but you need to go see the other patient. So, instead of having them just lay down the whole time—if they're comfortable you can leave them there—but if you want to have them sit up to be more comfortable, you can hit this last button, which is what we call our last stored position.
So what it will do is it will bring the chair back all the way up. And then when you're ready to come back in the room after doing that hygiene check or seeing that emergency patient, you can hit this button again and it will go back to that last stored position that you were at. And it's going to allow you to not have to find that perfect position that you were working on.
To store program presets, the way we're going to do that, is if we want to change our entry and exit height—sometimes what we find is that for older patients the chair is actually too low for them to actually get up—they have to shimmy out, or they need help getting out of the chair. So sometimes we need to bring the base up a little bit. From there if we hold the “p” button down, you're going to hear one beep, and then if we want to store that position you'll hear three beeps. That lets you know that that position has now been stored.
Same idea with our treatment or supine position. As we lay the patient back, if we feel like the chair is too high and we need to lower the chair down, we can actually let the chair get into place, and then we can lower that chair down, bring that backrest down a little bit and from there we can hit the program—hold it down—and we can hit that treatment position and then that will store that position for you.
This last program position button that I was talking about, that could be—if you had a cuspidor—that could be your cuspidor cup and spit if you will for that patient, or you can actually have this still be stored as an imaging position or something like that. We can make this a stored position, but we can also have that be that last position as far as it's concerned.
Functionally, to make the chair kind of in manual settings, we can just press the up button or the down button, to bring the chair down. And then the same idea to bring the chair back up or down—we can do that with our left and right and up and down arrows. The same idea goes for our assistant's touchpad. We have the same ability with our manual presets: our manual function right here left right up and down. We also have the entry and exit and we have the treatment position.
Now, on the assistant's touchpad, we actually have four preset buttons. And those buttons, there is one additional button that will allow you to have a fourth preset, and that fourth preset could actually be—if you wanted to make this first treatment button your maxillary arch and then the second treatment position button—you can make that your mandibular arch where you bring the backrest up a little bit to give you a better view of the patient's mouth. And then the last button can still be that last stored position. But you have the full functionality from this touchpad and the same presets stored for both touchpads.
So, as we talk about the most important part of the chair, we're going to get into the headrest here. And why I say that's the most important part of the chair, is because most patients, when they sit down in a dental chair, their universal spot—to feel seated correctly—is the headrest. So, a lot of offices that I walk into, what they'll have, is they'll have the headrest position down just like this. And to me, it's the biggest issue for doctors when they're working in the most ergonomic position because they don't understand the full functionality of the headrest, and they don't understand how to get their patients into the proper seated position.
So, if I sit down in this chair, the first thing that you're going to notice is that when I sit down, I'm going to have to scoot all the way down to the toe of the chair to get my head into a good position. If I ask the patient to scoot all the way back by grabbing onto the armrests, what's going to happen is, now I'm in the best position as far as where I'm supposed to be seated in the chair, but I have no support for my head. So, if I bring this headrest and create an upside down “V” or the “A”, if you will, I'm giving a little bit of support for my head here by bringing this forward. Every patient has some type of forward head carry. And because of that, you need to support the head with a little bit of forward press on the headrest.
So, moving forward, having the headrest properly positioned—we have that upside down “V”. What you're going to allow here, is that when this is positioned properly and the patient is laid back into the treatment position, you're going to give the doctor, the correct amount of wiggle room to be able to use this pinch lever to articulate that patient's head when they're laid back in supine. Most every patient that you're going to encounter has some type of forward head carry, and so all we're trying to achieve here, is the ability of supporting that forward head carry for that patient, when they are laid back into supine. Instead of having that patient ask for that neck pillow, we now don't have to have that neck pillow, and we're supporting that patient's head with the utilization of the headrest.
There is a secondary slide on this headrest as well that will move independent, and will allow the patient to—when they lay back—the headrest will glide a little bit with that secondary slide on the headrest. So, if I am acting as the patient, I'm going to put my armrest forward, I'm going to give myself that runway. The headrest is aimed high, and so then I'm going to sit down, I'm going to pull my armrest back up. I'm going to hold on and scoot as far back as possible. And then from there, I'm just going to lay back and my arms are supported by the wing-back of the backrest. And then if I want to, and I bring myself back into treatment position, what you'll notice is that when I'm laid back, I'm in a much more comfortable position versus the patient that is not in a comfortable position where their head is flat and they don't feel as comfortable and they need that neck pillow.
So, from here if I needed to, I could grab onto the lever, and I could slide that down, and then I give the ability for my occlusal plane to be more perpendicular—so when a patient is looking up, their chin is always up the doctors and the staff always fight the idea of “chin up, chin up” with their patients. And so, with this new chair, you have the ability—with the headrest—to have the patient in a much better position ergonomically for themselves, as well as for you. And you're allowed to see more and able to work with a much better field of view in the oral cavity.
So, as I bring myself up, one thing that I want you to notice is that where the headrest sits now, versus when I was originally in the chair. When you're working on the maxillary arch, what we're going to want to have is we're going to want to actually have that headrest tilted more back. And then the same idea, we want to adjust that, depending on which arch we're working on, or quadrant we're working on. Your local A-dec TM [Territory Manager] can come into your office and help you with this, but what's really important is that you actually utilize this headrest properly when you're seating patients or having your assistant seat the patients for you in the operatory, before you walk into the room. You don't want to have to be messing with this when the patient is already in the chair.
So, that's some of the functionality of the chair and the headrest. I would tell you that the most important thing that I think about with any chair in a dental office, is the headrest. We want to try and get away from the idea of utilizing this as just an additional piece of the backrest. We actually want to bring this up, bring it forward to the patient—to support their head—and that will help you work in a much better posture. And give you a better field of view when you're looking into that oral cavity.
So lastly, the last adjustment that we have on the chair is: there is a set screw right here, that adjusts the tension of the glide bar. If you feel like that glide bar is falling very easily, or it's sliding down independently of you moving it, you can take an Allen wrench and slide it in there and give it a quarter turn and that will adjust the tension to where you can set this and it will stay where it needs to stay.
Related videos
A-dec 500 Dental Chair Cleaning and Disinfecting
Learn how to properly clean and disinfect your A-dec 500 dental chair.
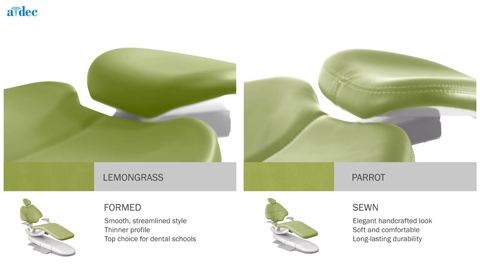
A-dec 500 dental chair upholstery
Explore A-dec's sewn and formed upholstery options in a multitude of colors.
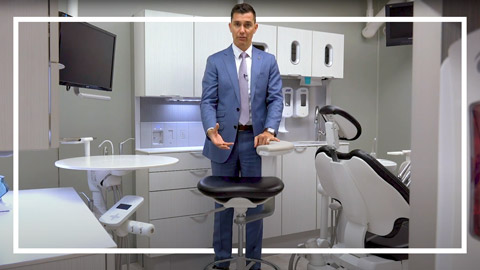
A-dec 522 Dental Assistant's Stool Overview
Get tips on using and adjusting the A-dec 522 dental assistant's stool.