Headrest Seating And Positioning Tips
Duration 7:51Headrest tilted. Arms supported. Posture neutral.
Whether it’s you and your team or your patient’s comfort and access, A-dec equipment is designed for healthy ergonomic positioning and optimal viewing angles. The key is properly adjusting it for each user.
Territory Managers Aaron and Kevin demonstrate some easy adjustment tips for:
·Proper patient seating
·Double-articulating headrest adjustment
·Operator seating
Video transcript
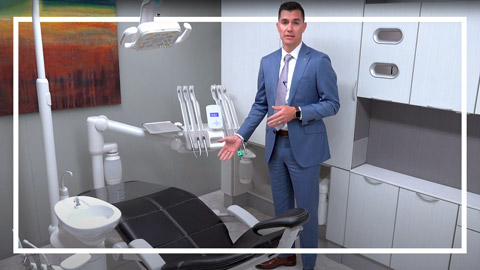
Hi, my name is Aaron. And this is Kevin. And we're both A-dec territory managers in Oregon and Southwest Washington. Today we're gonna go over a few key components as it pertains to ergonomics. Particularly, we're going to go over proper patient seating, proper use of the double articulating headrests and operator seating.
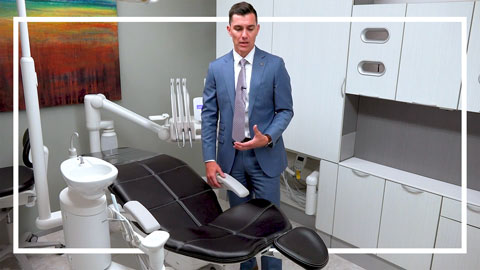
So now what we're going to do is demonstrate the proper way for the patient to be introduced into the chair. What we want to do is we want to make sure that the glide bar, the headrest, and this big metal part, it's called the glide bar—is lifted up out of the back of the chair. We don't ever want to leave this all the way pushed down. We want lift this up out of the back of the chair. The headrest also has a secondary slide that's gonna be this portion here. So it's also important to make sure that we don't lift just that part up out of the back of the chair. If we want to get the glide bar out. And we want to have this part of the headrest lifted up, maybe just a little bit, just about a third of its range of motion. And by that I mean it can go all the way up that tall, all the way down here. We wanna lift it up to just about there.So I'm gonna leave that here, and then I'm gonna bring the headrest using the lever forward. Okay? Just like this. I don't wanna leave this flat, I wanna bring this forward, and then I'm going to take the armrest and I'm gonna push it all the way forward. What we're trying to do here is to encourage the patient to sit here at this part of the chair. The way that this upholstery set was designed is very purposeful, and it's important that the patient is seated with their back all the way against the backrest to take advantage of all the lumbar support and to take advantage of where the knee break is, and also to allow you to properly adjust the double articulated headrest. So with that, I'm gonna have Kevin come back on screen and sit in the chair the way that it was designed to do.
Now, you'll notice how his feet were square on the ground—in this cutout. You can see how his feet, they're right at the edge of the chair, but they're certainly not dangling over. And at this point what I'm gonna do, and I'm gonna take this armrest down and give his, basically his forearms on down, a place to rest. Technically, your patient's arms are going to be supported by the backrest when they're seated properly in the chair. Now you'll notice what I also did is I lifted the glide bar up out of the back of the chair to get the top of the headrest roughly in line with his occipital bone.
So now that we have the patient seated, the headdress is pushed forward, as you can see here with this V, go ahead and lift your head up a little bit. I just want to again, show the incorrect way of adjusting the headrest. The incorrect way would be basically not adjusting it right? It would be if it's completely flat like this, we want to make sure that we bring it forward to the patient. The reason why we want to do that is because we want to have a space for our hand to be cradled when we take them into a supine position so that when we engage the lever mechanism, we can support the weight of their head, right? If this is completely flat and we take them to a supine position and try to adjust it, it's pretty much impossible. So what I'm gonna do now is I'm going to take Kevin into a supine position, and I'm going to basically show the correct way to do the secondary adjustment on the headrest.
So this is really the key component here as well. You'll notice how his chin is pointed down. It's gonna be a little bit difficult for him to open. What we want to be able to do now is we want to get his maxillary roughly perpendicular to the floor. And the way that we're gonna do that is I'm gonna put my hand right here. I'm gonna take the meaty part of my palm so that I can engage that lever. So I've just engaged the lever and all I'm going to do is I'm going to push the glide bar into the back of the chair ever so slightly as I tilt the headrests back just like that. So now his maxillary is perpendicular to the floor. It's gonna be much easier for him to to open. And when I take him base down and work around the patient, we're gonna have much more room to work around the patient because we're now working around the narrowest part of the chair, as opposed to the widest part of the chair. The widest part of the chair would mean that we'd never lifted that bayonet out of the back of the dental chair, forcing everybody to in the on the dental team to work downstream.
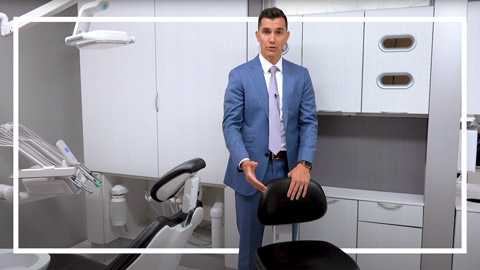
So now we're gonna talk about operator seating. It's important that whatever stool that the operator is using can put the user into a neutral balanced position. A neutral balanced position is one that's going to put the least amount of stress on the joints and on the spine, and is also going to allow for better circulation to the feet and to other extremities. So a good stool should be able to have a back rest that adjusts. So I'm gonna lift this backrest up and it should also be able to adjust to come to the user's back. This is important because if you have a smaller user who maybe can only take up this much of the seating surface, if you have a backrest that can adjust far enough, you can see how far forward this backrest can come.
So the next thing that I'm gonna do with the stools, I'm gonna adjust the height of it. I want to make sure that my hips are slightly above my knees. The next thing that I'm gonna do is I'm going to tilt the seat pan forward just a little bit. The reason why is if I'm gonna sit in a neutral balanced posture, meaning having a nice S-shaped spine, it's gonna be very difficult for me to maintain that for long periods of time if my seat pan is parallel to the ground. So what I'm going to do is I'm going to just tilt it forward ever so slightly. And what that did is essentially rolled my hips forward and it shifted my weight from my core to my larger muscle groups, which makes it much easier to hold that neutral balance posture for long periods of time with minimal energy expenditure.
So the last thing that I'm going to do, and the whole time that I'm adjusting this as I'm exaggerating good posture, is I'm going to bring this the backrest to my back. So I'm gonna lift this lever that you can't see, but I'm gonna bring it forward to provide me back support. So now I'm essentially pushing up off the ground with the balls of my feet. I can feel my leg muscles engaged, which is allowing me to hold this posture far easier than it would be if I were using just my core. So reviewing just for a few moments, I like to think of this in terms of some posture checkpoints. We wanna start from the the ground and we want to work our way up. So we're gonna start with our feet parallel to the ground. We want to make sure that our knees are above our ankles.
We want to make sure that our hips are slightly above our knees. We want to make sure that our shoulders are above our hips and that the crown of our head is above our shoulders. And if I can do that and work high around the dental chair, I'm gonna be sitting in an optimal ergonomic position. The patient should be comfortable if they've been appropriately seated in the chair and if the headrest has been adjusted properly. And for the most part, you should be able to take complete advantage of all the ergonomic advantages of this chair with regards to both patient comfort and allowing the dental team to have better access and vision to the patient. So today, we have covered proper patient seating using the double articulating headrest and proper operator positioning.
Related videos
A-dec 500 Dental Chair Overview
Explore the features and benefits of the A-dec 500 dental chair.
A-dec 500 Dental Chair Cleaning and Disinfecting
Learn how to properly clean and disinfect your A-dec 500 dental chair.
A-dec 521 Doctor's Stool Overview
Discover the ergonomic features of the A-dec 521 doctor's dental stool.