A-dec Inspire 591 Rear Dental Cabinet Control Center Overview
Duration 5:54Get detailed guidance on using the A-dec Inspire 591 rear dental cabinet control center to program and streamline the dental operatory.
Learn more about A-dec Inspire dental cabinets.
Video transcript
So, in this video, we're going to pay attention to our control center that is attached to our 591 rear cabinet. The control center itself gives us the ability to control most of the functions of the operatory through one touchpad and one screen that we can touch to control our chair, our lighting, timers, things like that that we're going to need while we're in the operatory, treating a patient.
As we look at the touchpad, the control center itself, we have the ability to turn the undermount LED lights on and off, as well as surrounding cabinetry lights, if needed. We can turn that on and off, just by the touch of the button. If we wanted to have the ambient light turned on and off, we could actually wire low voltage, through to the distribution box, and we could press this button and that would allow lights to turn on and off. We have a couple of different options as far as it's concerned to what we want to wire into the auxiliary channels on this touchpad if we wanted to change that functionality, we could change it to headphones—we could change it to some type of plug, whether it's another stop clock or something like that. A fan in the operatory—anything like that—we could change that auxiliary button to whatever we want to store that as. And then that button will then change the icon as well. And we can cycle through as far as we want for that. And just by tapping it, we can turn it on and off.
These three buttons right here, allow us to control any auxiliary low voltage item if we would need. The next button is actually our ICV button. That ICV button will allow us to turn on and off the tank that is going to clean our vacuum lines. If we need to actually change the time, and the allotted time that the one liter of solution is pulled through our vacuum, we can actually hold that down—increase or decrease that time, just by holding the button down—setting that time and then when we depress that, it will start that 35 second countdown.
Getting out of that, we now have the ability to control the chair as well. So, we have three chair features on this touchpad, in this control center. The first one is our entry and exit. We also have the first treatment position—that normally we're utilizing that treatment position as our maxillary treatment position. And then the button next to that, is actually our end-of-day position. What that's going to do is lift the chair completely all the way up, and it's going to really remove the footprint of the chair in the operatory. So, all we're going to have is really the base plate of the chair as the footprint in the operatory, and as your cleaning crews come in, like the end of the week or anything like that, they're not going to be banging into anything on the chair. It's going to remove a lot of that equipment out of the way for your cleaning crew.
Next to that, we have the ability to adjust our brightness and contrast, if we would like, just by hitting the up and down arrow. And then the last button we have, is basically a lockout button. It's a 15-second lockout. And what that allows us to do, is if we need to re-barrier, or we need to clean that screen with anything—that you would clean your cell phone with, or your monitors on your TVs, or anything like that, that's what we would recommend to clean that screen. But if you need to re-barrier pull that barrier tape off and then put that back on without touching anything, you could lock yourself out by holding that button down.
So, as we move up from the buttons on the bottom portion of our control center, we then get into basically our clock and timer. And the way to adjust these is if we want to set a timer for six seconds, we can actually hit that button, and that will run that six second countdown timer for us. You'll hear a chime, and that chime can actually be changed. If you hold that button down, you can increase or decrease the time needed. As far as if you are setting up any materials or anything like that, you can change and cycle through the chimes. And you can increase or decrease the volume based on what you would like that volume to be. So, now that timer I just changed from six seconds to two minutes and three seconds. The one next to it, we could also change if we wanted it to be a minute, we can make that drop down to a minute. We can change that chime once again, that's going to be set for that one. The last stopwatch, defaults to zero, as far as the time is concerned, will count up. So, if you want to see how long a procedure takes you to do or see how long it takes to turn a room over, or anything like that. You could walk in here, hit that button and then see how long it takes you to actually do a procedure or turn that room over.
If you need to change the time, you can actually hold the time down. You'll notice that it goes to black and then it goes to a black screen, where we can increase or change the time if needed. And then the last thing we have is the date. If we need to adjust the date—we can adjust the date to whatever we would like to have as far as the settings for that is concerned. The one thing I like to point out as well, is that when we do have a countdown timer, you'll notice that the countdown timer is large and above that is the actual time of day still. So, you're still going to be able to see what time it is even though you're using that countdown timer. So, that's the features and functionality of our control center. Like I said, it gives you the ability to control many features of the operatory from one touchpad, and gives you that much more control of the operatory when you're treating that patient.
Related videos
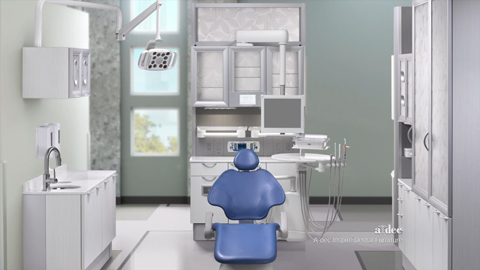
A-dec Inspire dental cabinet collection
See the beautiful and ergonomic A-dec Inspire dental cabinet designs in action.
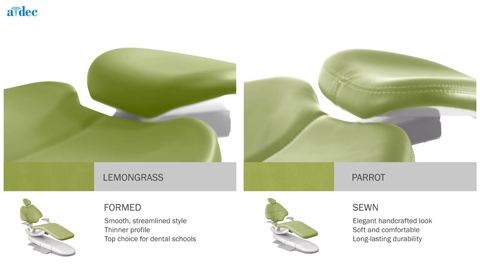
A-dec 500 dental chair upholstery
Explore A-dec's sewn and formed upholstery options in a multitude of colors.
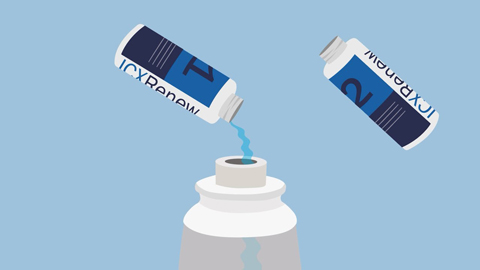
A-dec ICX Dental Unit Waterline Treatment Overview
Follow these 12 simple steps on how to shock your dental unit waterlines with A-dec ICX Renew.