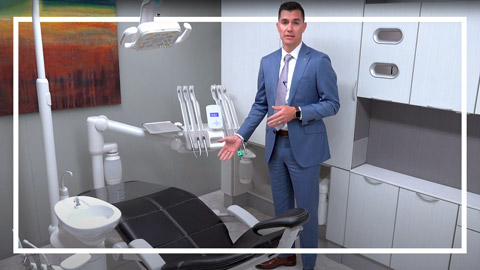
A-dec 500 LED Dental Light Overview
Duration 5:41Explore the features and benefits of the A-dec 500 LED light in this detailed overview.
Learn more about the A-dec 500 LED dental light.
Video transcript
So now we're gonna talk about the 500 LED light. We're gonna talk about the features as well as the functionality of the light. So when we talk about the light, as far as the functionality of it, one thing that I want you to pay attention to is that we have a 540-degree swivel on this light, which will allow you to place this light and any position that you need specifically for that clinical procedure that you're trying to achieve or do that day. The other feature that we have with the light is the ability of the barycentric, pivot point for us to rotate or kind of adjust this access of this light with the barycentric pivot point, when we're turning the light on and off manually, there's a little bumper switch at the back here that we can just hit with our finger or the back of our hand.
Makes it very easy to turn it on and off. As far as it's concerned, what you'll notice here as well is that we have the ability to adjust the intensity with these bumper switch, kind of toggling up and down on that switch. As I focus this light on the dental chair, when I adjust the intensities, what you'll see is that we are at right now, our lowest intensity as we increase or toggle up through our intensities, we increase the brightness of the light. We also can get into what we have as far as our cure-safe mode here. the cure-safe mode filters out all of our blue light, which will set up any of our composite or any materials that we're using on a regular basis in our office. The blue light that is filtered out from this LED light won't set the materials up, but be cognizant of your ambient light, still setting up your materials faster than what you're specifically your manufacturer's state it will.
But those are the ability to toggle through the light manually. If I come over to my touchpad on my delivery unit, I've got a button over here that it looks like a light as well. If I touch that, that will then turn my light on as well manually. It's almost like a three-way switch between the manual button on the back of the light, as well as on the delivery system as well here. If I just touch the touchpad, it will cycle through those settings as well. I can go basically run through the cycle in that process. If I hold the button down, it will turn the light off for me as well. The same goes for the delivery system, as well as the assistant's instrumentation. We've got the light button over here. You can press through that, and that will allow you to toggle through those light settings intensities as well. So as we move into the auto lamp feature and we get away from the manual on, off switch on the light and the touchpad within our pre-program settings on the touchpad, if we hit the supine or treatment position, the light will then turn on with the auto lamp feature. What that's going to what that's gonna do is when the patient gets back into supine, the light will automatically turn on.
And a lot of doctors are, are used to is that the light is positioned out in this position right here, based on the fact that they're, they were comfortable using halogen lights. But halogen light was so hot that a lot of doctors tried to get it as far away from as possible. A lot of times they just felt the heat coming off it. LED lights, don't admit as much heat. There is also a heat sink on the back here. It's a magnesium heat sink. So there's gonna be less heat as far as it's concerned, transferring out of the light. So that's one feature that, that most doctors appreciate as well because of that feature. A lot of doctors were comfortable with the light being right here, but if we actually bring this light and slide it around and bring it kind of over about 10 degrees off of our eye, or kind of in that field of view, a lot of doctors wouldn't use a halogen light this way because they would feel the heat.
But with the LED light, what you're going to allow is you're going to allow that forehand to pass freely without creating shadowing. And you're gonna be able to look into that oral cavity and look at that surface that you're working on and see clearly based on that light, being about 10 degrees off your head. So that's one feature to think about when utilizing the LED light, we can adjust this light kind of and turn it how we would like, depending on which surface we're working on. So as we hit the exit button, the light automatically turns off, we then return the light back to the position over here. So as we get into the barriers for your light, every light ships with two of these safe shields. These light barriers are the idea of what you're gonna utilize with your cell phone.
They're held on by static electricity there. You're just going to peel those off when they're dirty. You're gonna wipe these down after every patient with your warm, soapy water. The idea behind these is that you're not actually wiping the plastic down specifically with the caustic materials that can be in any of the, the cleaning materials that are used, because we know those still get used in the office. The other thing that you can utilize is the light has a little cutout right here where the handle actually sits on the light with the utilization of a syringe cover or anything like that. Or a camera sheath. You can actually take this cover and place this on here so that you have a barrier on the handle as well. So those are some of the features functionality of the light. If you have any questions please feel free to reach out to your local TM (Territory Manager).
Related videos
A-dec 500 Dental Chair Overview
Explore the features and benefits of the A-dec 500 dental chair.
A-dec Inspire 591 Rear Dental Cabinet Control Center Overview
Watch how to optimize the A-dec Inspire rear dental cabinet control center.
A-dec 541 12 O'clock Duo Delivery System Conversion
Learn to quickly convert the A-dec 541 12 o'clock delivery from right to left.


